How do I create a custom page in WooCommerce?

Have you ever wondered how to create a custom page in WooCommerce? Are you struggling to find a way to make your eCommerce website more unique and tailored to your business needs? What if there was a simple solution that could elevate your online store to the next level?

A recent study by A Better Lemonade Stand indicates that approximately 20% of eCommerce businesses struggle with setting up customized store designs, often causing customer dissatisfaction and business loss. Similarly, BigCommerce also confirmed the same problem, stating that being stuck with standard templates undermines the unique business identity. Indeed, the issue is alarming yet there exists a viable solution. Creating a custom WooCommerce page not only justifies unique business needs but also disrupts typical e-commerce monotony. Evidence lies in recent surveys conducted in the USA indicating that businesses with customized pages have reported higher customer engagement and increased sales.

In this article, you will learn the explicit process of how to create and implement your very own custom page in WooCommerce. Given the serious issues confronting many eCommerce entrepreneurs today, it’s crucial to learn how to distinguish your online storefront from that of your competitors.

We promise in-depth instructions, guiding you on picking the best theme, understanding how to use WooCommerce shortcode, and efficiently setting up the custom page. We will walk you through every detail making sure that after reading, you are fully equipped with the knowledge to create a unique WooCommerce page.

How do I create a custom page in WooCommerce?

Definitions and Meanings: Creating a Custom Page in WooCommerce

WooCommerce: WooCommerce is a flexible, open-source eCommerce solution built on WordPress platform. It provides a range of features for building an online store, including product pages, shopping carts, and checkout processes.

Custom Page: A custom page in WooCommerce is a web page that you define and design according to your specific preferences and requirements, rather than using a pre-defined page template. It allows you to create a unique and tailored customer experience.

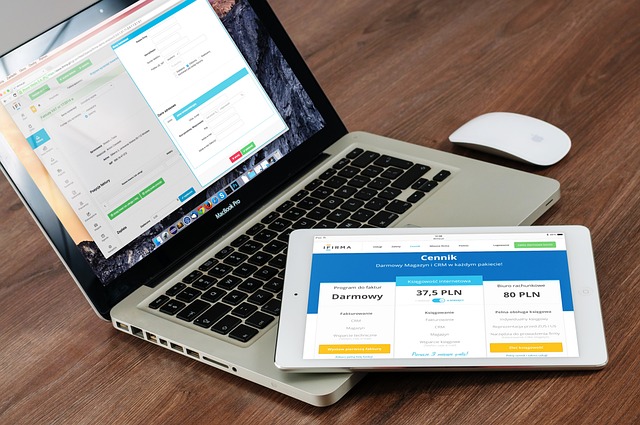
Creating a Custom Page: This usually involves knowledge of HTML, PHP, CSS, and sometimes JavaScript. However, various plugins can simplify this process, even for non-technical users, by providing a straightforward, drag-and-drop page designing experience.

Unmasking the Secrets: Custom Page Creation in WooCommerce

Understanding Custom Page Creation in WooCommerce

Building custom page layouts in WooCommerce is a powerful tool to enhance the appearance and functionality of your eCommerce store. It consists of creating a unique and specially designed page that diverges from your theme’s default layouts, allowing you to manifest your style and personality. This not only improves your brand’s identity but also significantly enhances the user’s browsing experience, influencing their purchasing decisions.

The most straightforward way to create a custom page is through WooCommerce templates, where you can design a layout that matches your brand’s aesthetic, and then apply it to a selected set of pages. However, if you’re looking for a versatile solution that is easy to implement, use a custom page builder plugin like Elementor, Divi, or Visual Composer. These plugins offer a user-friendly drag and drop interface, saving you from the complexities of coding.

Steps For Creating Custom Pages Using Page Builder Plugins

Page builder plugins provide a seamless and efficient way to design and develop custom pages. While each plugin may have a slightly different interface or process, the following are general steps you can follow when creating your custom WooCommerce page:

  • Choose a Page Builder Plugin: Select the one you find most intuitive and compatible with your WooCommerce site.
  • Plugin Installation: Download the plugin, install it to your WordPress website, and activate it.
  • Create a New Page: From your WordPress dashboard, navigate to ‘Pages’ and click on ‘Add New’ to start designing your custom page.
  • Designing the Page: Use the drag-and-drop functionality of the plugin to add sections, elements, and modules. Many plugins also allow you to preview your page as you design it, ensuring it aligns with your vision.
  • Publish Your Page: Once satisfied, click ‘Publish’ to make your custom-designed page live.

Take note, some plugins may require additional steps such as importing their pre-designed templates or layouts. Always make sure to comply with the specific directions provided by your chosen plugin to ensure the smooth creation of your custom WooCommerce page. The scale of customization offered by these plugins enables you to design pages that go beyond standard layouts, facilitating a truly personalized and unique website.

Therefore, it’s integral to remember that customizing your WooCommerce pages is not just about making your site look better. It’s about creating an environment that reinforces your brand, improves customer interaction, and ultimately, encourages more sales and customer retention. Your eCommerce competitors are already capitalizing on this feature, why shouldn’t you? Create your unique WooCommerce pages today and transform your user’s shopping experience.

Shattering the Code: Designing Your Own Custom WooCommerce Page

Fueling Your Curiosity: Decoding the Complexities of WooCommerce Customization

Have you ever thought about the incredible potential of a customized WooCommerce page? The ability to engineer a site, molded perfectly to the needs of your business, is not just a possibility but an achievement within grasp. Customizing your WooCommerce page is a simple and effective way to increase your brand visibility and ensure maximum user engagement. By personalising your customer’s shopping experience, you provide a certain level of unique interaction that breeds customer loyalty. Understanding the mechanics of WooCommerce customization opens a universe of fresh and innovative opportunities.

Tackling the Roots: Identifying Hurdles in WooCommerce Custom Page Creation

Creating a custom WooCommerce page is a feat that frequently elicits unwarranted anxiety. Often, business owners are under the incorrect impression that you need extensive coding knowledge to take full advantage of WooCommerce’s versatile platform. Tailoring the look and functioning of your WooCommerce webpage demands a careful analysis of your specific goals and a clear vision. The major hurdle often lies in understanding and navigating the intricacies of WooCommerce. If you wish to unlock your WooCommerce page’s full potential, it is vital that you familiarize yourself with the various tools and features offered.

Bringing Theory to Practice: Learning from Real-life Success Stories

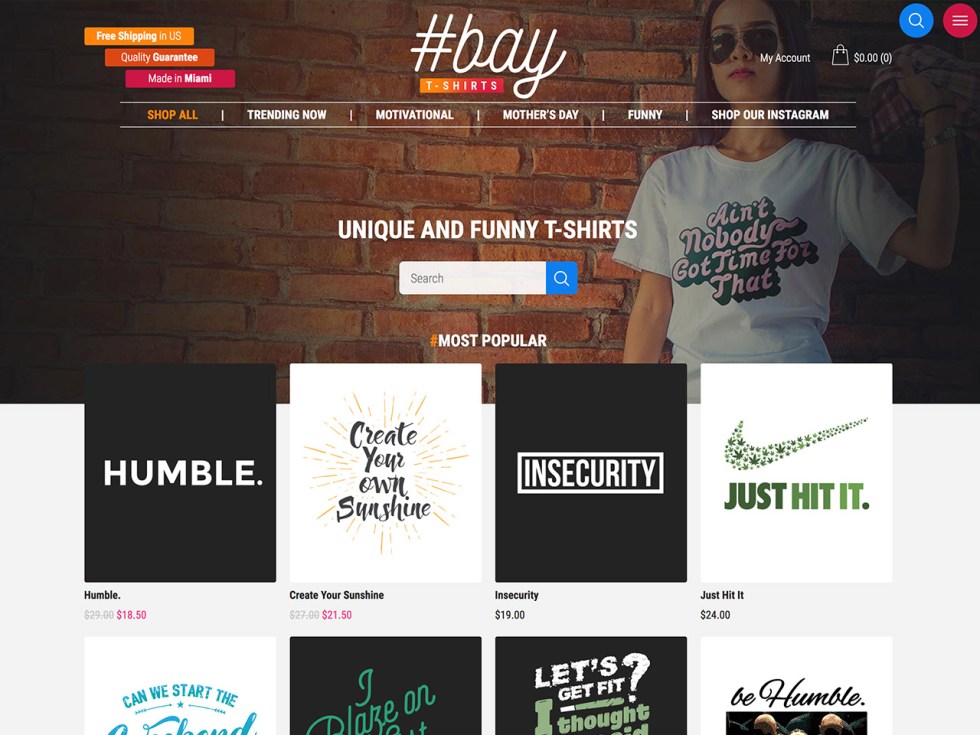
Drawing from the experiences of successful businesses may quite literally set you on the path to success. Let’s consider an online sports apparel store, for example. They prioritised a WooCommerce customization strategy, meticulously creating custom ‘shop’, ‘product’, and ‘checkout’ pages that perfectly aligned with their brand image. The result was not only an increase in customer engagement but a noticeable surge in conversions. To create your custom pages, you can use a tool like WP Page Builder or Beaver Builder. They allow you to create custom layouts, insert product meta and images, and more without writing a single line of code.

Another prime example is an e-book store that used custom WooCommerce pages to offer ‘read a sample’ and ‘author details’ features. They acted upon their specific needs by crafting a fully custom ‘product’ page, thereby providing an enriched shopping experience for their customers. Tools like ACF (Advanced Custom Fields) eased their journey, letting them create and manage these custom pages without any complex programming.

With the right approach and understanding, any business can shatter the code of WooCommerce customization. Unique and engaging WooCommerce pages are not just a distant dream but an achievable reality that can propel any business towards growth and success.

Elevate Your ECommerce: Turn Custom Pages into Profit with WooCommerce

Unlocking Potential with WooCommerce Custom Page Templates

Ever thought about the latent potential hidden in your eCommerce platform? You may have used WooCommerce to set-up your online store, but have you tapped into the versatility of creating custom pages? There’s a whole new world of opportunities waiting to be unlocked on the other side of this endeavor.

The crucial idea to comprehend is that WooCommerce is much more than just a platform to sell products; it’s a comprehensive tool. Creating custom pages allows you to design and tailor unique experiences for your customers. This work can pay dividends, with potential to increase audience engagement, usability, and sales conversions. The ability to fully customize special pages like about us, contact us, privacy policy, and many others, leads to a more personalized user experience where they can better connect with your brand.

Addressing Challenges in Custom Page Creation

Transitioning from using standard WooCommerce pages to designing custom pages can present some challenges. Lack of the right skills, confusing adjustments in settings, and compatibility issues with themes are some hurdles that many WooCommerce users have to deal with. With these obstacles in their way, users often tend to stick with pre-designed pages rather than taking the journey of customization.

What’s crucial to understand, however, is that these are solvable issues. Acquiring some basic skills in HTML, CSS, and maybe PHP could be hugely beneficial, many tutorials and community forums are available to help. The power and flexibility provided by custom page creation are distinctly worth the effort to overcome these hurdles. And with time and practice, the issues faced become fewer and the process, more straightforward.

Profiting from Best Practices in WooCommerce Custom Pages

A really good starting point is to make use of WooCommerce’s built-in custom page templates. These templates open the path to create checkout pages, cart pages, and product detail pages, among others, that are significantly tailored to your needs. For instance, you could design a checkout page that’s aligned with your brand’s theme and thus, more engaging for the users.

Another best practice is to take advantage of popular WordPress plugins like Beaver Builder and Elementor. These plugins offer user-friendly interfaces with drag-and-drop features that ease the process of custom page creation. Finally, a noteworthy mention is the WooCommerce Shortcodes. By using these handy shortcuts, you can add numerous WooCommerce-specific elements without having to write complicated codes. Through implementing these practices, the power of custom pages can be fluent in your online store, significantly boosting its performance.

Conclusion

Have we ever considered the limitless possibilities of expanding our business footprint by integrating unique, customizable pages in WooCommerce? The very concept is not only exciting but also holds immense potential for businesses. With custom pages, we can strategically offer exclusive content, personalized product lines, and enticing deals to our consumers, thereby improving our sales metrics and brand visibility. Custom pages also provide us the ability to experiment with various UX/UI designs which subsequently enhances the user experience.

It’s always thrilling to share such enriched content that caters to the interests of our entrepreneurial minded readers. Our blog is a repository of crucial insights, recent updates, and exciting features that entrepreneurs and businesses need being equipped with. Following our blog posts will not only keep you updated but also progressively arm you to stay ahead in this dynamic, digital-age market. Our blog space is consistently refreshed with new content that aids you in effectively navigating the e-commerce landscape.

As we continue to explore more features and tactics, your wait for our forthcoming posts will be worth every bit. We are excited to share our next releases, which we believe, will inspire you to innovate and renovate your e-commerce strategies dynamically. Remember, the key to growth in e-commerce is constant learning and implementation. Let’s continue this journey of growth and innovation in the WooCommerce world together.

F.A.Q.

FAQ Section

1. How do I add a new page in WooCommerce?

To add a new page in WooCommerce, navigate to your WordPress dashboard, then look for ‘Pages’ and click on ‘Add New’. After creating your content, remember to publish the page for it to be visible on your website.

2. Can I customize the newly created page in WooCommerce?

Yes, WooCommerce allows for page customization. After creating a page, you can use the ‘Edit’ option or a preferred page builder plugin to style and format the page to meet your needs.

3. Which plugins can I use to customize my WooCommerce page?

There are numerous plugins available for WooCommerce page customization. A few popular ones include Elementor, WooCommerce Customizer, and Beaver Builder, which offer various templates and design elements.

4. How can I add a product to the custom page in WooCommerce?

To add a product to your custom page, use WooCommerce shortcodes or blocks (if you are using Gutenberg). Insert the appropriate shortcode or block in the location where you want the product to appear, then publish or update the page.

5. Can I make my custom page the default shop page in WooCommerce?

Yes, you can make your custom page the default shop page. Navigate to WooCommerce settings, click on ‘Products’ then ‘Display’. Here, you can select your custom page to be your default shop page.

How to install custom theme in Magento 2?

Have you ever considered how custom themes can boost your website’s appeal on Magento 2? Can you comprehend the significance of having a unique, personalized theme and how can it foster better customer engagement and improved sales? Have you ever wondered about the challenges regarding installing custom themes in Magento 2 and how to tackle them effectively?

The challenge facing many Magento 2 users with regards to installing custom themes is well documented with authoritative sources such as Magento U and the Magento DevDocs highlighting the complexities involved. These include not only the technical aspects but also the compatibility issues and potential problems such as themes not matching the Magento version. The existence of these issues becomes evident in the survey results from various eCommerce sources within the US. There is an urgent need to demystify the process and provide a streamlined, structured approach to installing custom themes.

In this article, you will unearth the intriguing and multifaceted aspects of installing a custom theme in Magento 2. Boosted by expert insights and simplified instructions, we make it easier to improve your site’s aesthetics and functionality with a custom theme.

We aim to tackle the root of the problem, clarifying the technical processes and removing any uncertainties you may have. With a firm grasp of this knowledge, installing custom themes in Magento 2 will no longer pose an overwhelming task, but instead become an exciting opportunity to enhance your online store’s visual appeal while ensuring smooth functionality.

How to install custom theme in Magento 2?

Essential Definitions for Magento 2 Custom Theme Installation

Magento 2 is an open-source e-commerce platform with flexibility and scope for customization. This platform provides features allowing you to create an online store.

Custom Themes are the design templates that determine visual appeal of your website. This includes the colors, graphics, typography and overall style of your site.

Installation is the process of implementing a theme into a Magento 2 platform. It involves uploading and activating the theme so it becomes the new appearance of your online store.

Unlocking Aesthetics: The Ultimate Guide to Installing Custom Themes in Magento 2

Prerequisites for Installing Custom Themes

Before diving into the installation process, there are some essential prerequisites you need to be aware of. Having a detailed understanding of these will ensure a seamless installation process.

First, make sure that you have the latest version of Magento 2 installed on your system. Check the version by logging into your Magento Admin and navigate to ‘System’ > ‘Web Setup Wizard’ > ‘System Configuration.’ Next, you need to find a custom theme in accordance with your preferences. Many websites, such as ThemeForest and TemplateMonster, offer a wide array of Magento 2 themes. Before purchasing a theme, ensure that it is compatible with your Magento version.

Finally, you should thoroughly understand the FTP & SSH Magento file system. These systems are essential for transferring files between your local system and your Magento server. Tools like FileZilla and Putty will hugely assist in this process.

Step-by-Step Guide to Installing Custom Themes

Once you have met the prerequisites, it’s time to install your custom theme. Here is a systematic guide to installing custom themes in Magento 2.

  • Upload Theme: Use FTP or SSH to upload the theme folder to your Magento root directory. The path should typically be ‘app/design/frontend/’. Follow the directions provided by your theme developer to prevent any upload errors.
  • Connect to your server: Connect to your Magento server via SSH. Most hosting providers offer a ‘SSH access’ feature which can be enabled from the control panel.
  • Upgrade Setup: From your server’s command line, navigate to your Magento root directory and run ‘php bin/magento setup:upgrade’. This command checks the system for module updates and upgrades if any are being installed.
  • Deploy Static Content: Run ‘php bin/magento setup:static-content:deploy’. This command deploys static view files.

Refresh your Magento cache to see your new theme in action. From your Magento backend, go to ‘System’ > ‘Cache Management’, select the checkboxes and click on ‘Flush Magento Cache’. You can also flush the cache from command line by running ‘php bin/magento cache:flush’.

Switching over to your new custom theme is the final step. In the Magento backend, head over to ‘Content’ > ‘Configuration’. Under the ‘Default Theme’ column, click ‘Edit’. From the ‘Applied Theme’ dropdown, select your new custom theme and click ‘Save Configuration’. You’ve successfully installed a custom theme!

This guide provides a straightforward method to install custom themes in Magento 2. Always remember to backup your data and setup before making any changes. With all the necessary steps, you’re well on your way to give your Magento store a fresh, new look. Enjoy your new design!

Upgrading Your Storefront: Top Strategies for Installing Custom Themes in Magento 2

Don’t Underestimate the Power of Visuals, Right?

We often take for granted the impact of visual aesthetics on our shopping experiences. Yet, the truth of the matter is it plays an instrumental role. For e-commerce businesses, this translates to the theme of your online store. When your shop is powered with Magento 2, adding a custom theme can significantly enhance your site’s aesthetics, improve shopping experiences, and encourage conversions. The process isn’t as intimidating as it sounds thanks to Magento 2’s flexibility and impressive customizability options.

Frequently-Encountered Difficulties

But why do users hesitate to venture into the terrain of custom themes? One main roadblock is the perceived technical complexity. Installing a custom theme usually involves manual code changes, which most users shy away from. Another hitch might be the fear of disrupting the existing setup while trying to bring modifications. These are legitimate concerns because, without the right approach, the process may lead to downtime or, worse still, data loss.

Nurturing this fear often leads to many e-commerce businesses missing out on numerous opportunities to stand out from their competitors or connect better with their customers. They stick to the basic theme, which although neat and functional, may not fully capture their brand personality or emphasize their unique selling prepositions.

Adopting the Best Practices

Introductory difficulties should not hinder your progress towards creating a visually appealing e-commerce store. Here’s how to do it right:

1. Always create a backup of your Magento 2 store before commencing the installation process. This safeguards your data and allows you to roll back easily in case of any mishaps.

2. Get a Magento 2 theme from a well-vouched, reliable source. Ensure the theme is responsive and user-friendly, as this influences your audience’s experience and, ultimately, their buying decisions.

3. Once you download the theme, upload it to your Magento 2 directory. Extract the theme package into the app/design/frontend directory.

4. Head to the backend of your Magento site. Navigate to Content > Design > Configuration. Click on Edit, then, select your newly uploaded theme from the dropdown menu and save the changes.

5. Finally, clear the cache to ensure the theme is correctly loaded with no remnants of the old theme left behind.

This way, you can install a custom theme without disrupting your Magento 2 store’s operations, thereby transforming the look of your online storefront, amplifying your brand’s personality, and even boosting your conversion rates. Remember, each step you take toward enhancing your e-commerce store brings you one step closer to success in the highly competitive retail landscape. So don’t shy away from making necessary changes that set you apart.

Smart Branding with Magento 2: Deconstructing the Process of Installing Custom Themes

Is Custom Theme Installation Really That Complex?

When considering the process of incorporating a bespoke theme for Magento 2, one may wonder if its complexity extends beyond the realm of understanding for the average user. In fact, the opposite is true. The actual process of installing a custom theme in Magento 2 not only aids in enhancing your online store’s aesthetics but it also assists in the perfection of user-interface (UI) and user-experience (UX) traits. This process demands keen attention to some specific details. The most critical factor revolves around choosing the right custom theme that aligns perfectly with the brand’s identity, followed by properly installing it onto the Magento 2 platform.

Overcoming the Hurdles in Installation Process

The principal issue while installing a custom theme in Magento 2 predominantly lies in the technical aspect of the process. Navigating through the platform’s complicated structure can prove to be a daunting task for someone with limited technical knowledge. Specifically, problems may arise during the process of ‘Theme Registration,’ which involves writing codes in the ‘registration.php’ file. This file is used to declare the basic information of your theme to the Magento 2 system. Incorrect coding or entry of information can lead to errors, preventing the successful installation of the custom theme.

Another issue is the ‘Activation’ step, which is taken care of in the Admin panel. It involves navigating through ‘Content’, ‘Configuration’, ‘Design’, ‘Edit Store View’, ‘Default Theme’. Any misstep in following these steps can make the custom theme installation unsuccessful. Thus, it is advised to study the whole installation process in-depth before implementing it.

Best Practices: Getting it Right With Custom Themes

Learning from others’ successful practices can surely minimize the risk of failure during the installation process. For instance, VenusTheme’s LoftStyle Magento 2 theme is a great example of how a custom theme has been effectively utilized to enhance an online store’s attractiveness. The theme offers an abundance of custom layouts and designs which are easy to install. Another excellent example is the Priori – Responsive Magento 2 Theme by MeigeeTeam, which offers a plethora of functionalities that are beneficial for e-commerce businesses. The theme is highly customizable, SEO-friendly, and responsive.

Further, to avoid problems while installing a custom theme in Magento 2, one can follow some crucial steps: firstly, conducting a detailed review of the selected theme’s code to ensure it adheres to Magento best practices. Secondly, using Magento’s in-built ‘Set Up’ tool or the ‘bin/magento’ command that houses a list of powerful commands to help users install custom themes more easily. It is also beneficial to break up the process into smaller sections (Theme Registration, Activation, and Configuration) and tackle each one individually to ensure enhanced comprehensibility and application success.

Custom themes, when installed correctly, can provide numerous benefits for an online store, such as enhanced user engagement, improved navigation, and a greater driving force behind conversions. Be it Magento or any other platform, the correct incorporation of custom themes is bound to yield successful results.

Conclusion

Have we ever considered the profound impact a captivating aesthetic can make on customer experience and thereby directly influencing your eCommerce sales? The correct application of aesthetic themes can drastically escalate the perception of your website amongst consumers. The installation of a distinctive custom theme on your Magento 2 is not just an addition of some appealing colours and shapes, but rather embedding your entity’s unique DNA into your website. As a brand owner, it provides you with an opportunity to create remarkable memory hooks for your consumers and enables you to deliver a memorable visual experience.

We invite you to stay tuned to our blog for a constant stream of helpful tips, tricks, and instructions on everything related to Magento 2 and eCommerce at large. With an array of articles covering a diverse set of topics to assist you in optimizing your online entities, our blog seeks to be your go-to resource in navigating your eCommerce journey. You never know, the next compelling advice we offer might be the exact solution you’ve been searching for and might unlock new dimensions to improving your Magento 2 site.

We are consistently working towards equipping you with state-of-the-art knowledge and for this, we encourage you to look forward to our upcoming releases. We are excited about walking you through the captivating journey of maximizing your sales via an appealing presentation of your online store. Being patient in anticipation for our new releases will definitely be worth the wait, as they will be packed with a dazzling array of information and guides that will help you in further enhancing the performance and look of your website. We genuinely appreciate your continued support and understand that your commitment is the biggest compliment to us.

F.A.Q.

Q1: What are the preliminary steps before installing a custom theme in Magento 2?

A: Before you begin, ensure that you have your theme package ready and that you’ve backed up your Magento 2 store. It’s also essential to disable all cache related sections that can hinder the installation process.

Q2: How do I upload a custom theme to Magento 2?

A: You can upload the custom theme to Magento through FTP or cPanel. You need to upload the theme into the Magento 2 root folder under app/design/frontend/.

Q3: What is the procedure to activate the custom theme in Magento 2?

A: You can activate your custom theme through the Magento admin panel. Navigate to Content > Design > Configuration, choose the store view you want to apply the theme to, and select your custom theme from the dropdown.

Q4: How can I solve problems in case the custom theme doesn’t work properly?

A: If the custom theme isn’t working properly, you might need to clear the cache and then check. If the issue persists, contacting the theme provider or seeking assistance through the Magento community can be helpful.

Q5: Can I switch back to the default theme after installing a custom one?

A: Yes, you can revert to the default theme anytime. This is done via the Magento admin panel by following the same steps as activating the custom theme, only this time, you select the default theme instead.

What is PrestaShop built on?

Have you ever wondered what PrestaShop is constructed upon? Are you intrigued about the backbone infrastructure for this renowned e-commerce platform? Would knowing what PrestaShop is built on provide relevant, valuable insights for your business? We believe the answer to these thought-provoking questions is a resounding yes, which is why we have ventured deep into this subject to provide crystal-clear insights.

According to recent findings from The (ISC)² Cybersecurity Workforce Study and Gartner’s market research, the cyberspace has been challenged by an alarming surge in security threats. This is a primary concern for platforms like PrestaShop given the value of data they process. The crux lies in securing and managing the access points or vulnerabilities that could be stealthily exploited by cybercriminals. Remember, a well-secured platform is fundamental for the success of every eCommerce business. American business owners have voiced concerns over this, with surveys revealing that more than 70% of them perceive cyber security as their top priority. Hence, there is a dire need for more in-depth understanding of what PrestaShop is built on to secure and sustain businesses effectively.

In this article, you will learn about the ins and outs of PrestaShop’s structure. We will shed light on its architecture, the various technologies used, as well as why and how these choices impact the general security of your eCommerce platform. You will also gain insight into data management and understand the steps PrestaShop has taken towards ensuring cybersecurity.

Furthermore, you will be introduced to a handful of powerful features that make PrestaShop stand out from other platforms in the market. We have also prepared a selection of actionable tips and advice to help you take full advantage of the platform, while mitigating any associated security risks. By the end of this article, you will have a comprehensive understanding of what PrestaShop is built on and its implications for your business.

What is PrestaShop built on?

Exploring the Key Definitions of PrestaShop

PrestaShop is an eCommerce platform that is used by businesses across the globe to establish and operate online stores. It is built on PHP, a widely used programming language, and utilizes a MySQL database to store information. The intuitive interface and highly customizable nature of PrestaShop make it a popular choice for online retailers. Its structure is open-source, which means the source code of the platform is available for everyone to examine, modify, and improve upon, enabling businesses to customize it to suit their unique needs. The beauty of developing on PHP with MySQL is the outstanding flexibility and considerable power it offers for creating dynamic, data-driven websites.

Unmasking PrestaShop: Digging Deeper into Its Core Architecture

Understanding the Core Framework of PrestaShop

PrestaShop, a renowned e-commerce solution, is fundamentally built on the Symfony framework. Symfony, a robust, scalable, and flexible PHP framework, empowers PrestaShop with the ability to handle complex web development tasks, thereby enhancing its efficiency. It relies heavily on Doctrine, a powerful database abstraction layer (DBAL) and object-relational mapping (ORM) for PHP. This amalgamation brings about enhanced performance, modular structure, a plethora of features, and a high degree of customizability.

Its architecture is not purely Symfony, though. PrestaShop also embraces an Object-Model (OM) system, emulating an Active Record pattern rather than a Data Mapper one. There are more than 300 tables, and most of them benefit from a model class to interact with. Additionally, it executes the Smarty template engine to manage its views.

The Building Blocks of PrestaShop

PrestaShop’s strong foundation owes to its meticulously devised architecture involving several key elements:

  • Controllers: PrestaShop utilizes Front controllers and Module Front controllers to handle requests and produce responses. Each controller extends either a Framework or a Module controller.
  • Services: It utilizes a wide array of services from product comparison to cart management, enabling the seamless execution of complex e-commerce functionality.
  • Entities: Entities represent and manage data in your application. For instance, a product or a customer can be an entity.
  • Modules: PrestaShop comes with an array of pre-installed modules that enhance the functionality of your store.

Moreover, the PrestaShop software suite comprises other integral components such as its AJAX and jQuery utilities for front-end interactivity, and a sophisticated system for caching data for enhanced performance.

Navigating through this maze of resources might be overwhelming, but separating concerns through the Model-View-Controller (MVC) design pattern enables PrestaShop to maintain its efficiency and scalability. Even with such a convoluted structure, it quickly adapts to evolving digital commerce needs and expertly handles the weight of large-scale online stores.

The amalgamation of the Symfony PHP framework, Smarty templating engine, and a strategic architecture, instils PrestaShop with the power to confidently tackle the diverse demands of eCommerce scenarios. The recognition of these attributes has led to its wide adoption by several online businesses and developers worldwide. This has resulted in diverse and growing community that enjoys shared knowledge, skills, and consistent advancements.

Demystifying PrestaShop: Unraveling the Code Base that Powers this E-commerce Giant

Exploring the Inner Workings of PrestaShop

Is it not impressive how PrestaShop powers numerous online stores globally, allowing businesses to thrive and flourish in the digital world? The secret behind this powerhouse lies in its underlying technology – PHP. Yes, PrestaShop’s fundamental structure is built on PHP, a widely-used open-source scripting language mainly suited for web development. Aided by the Smarty template engine and MySQL databases, PrestaShop is practically limitless in its functionalities.

PHP provides the backbone for PrestaShop, with core operations built around it. Whether it’s handling products, customers, orders, or the several hundred available features, PHP works seamlessly behind the scenes. The Smarty template engine, on the other hand, takes care of the user interface. It allows developers to change the display without affecting PrestaShop’s PHP logic—thus maintaining a clear separation between the platform’s design and its business logic. Lastly, MySQL, a popular database management system, is used to safely store all the business and customer data.

Addressing the Complexity and Learning Curve

The intricate mix of PHP, Smarty, and MySQL leads to a common challenge for many aspiring PrestaShop developers – the steep learning curve and complexity. Not to mention, the constant introduction of new features and updates while maintaining backward compatibility add to this complexity. This issue has sparked debates within the developer community and raised concerns on PrestaShop’s adaptability in the face of evolving e-commerce trends, despite incorporating best coding practices and standards.

For most developers stepping into the PrestaShop ecosystem, understanding and keeping up with its complicated codebase becomes an uphill task. The lack of comprehensive documentation adds to the difficulty. However, it’s important to note that this complexity also stems from PrestaShop’s versatility and flexibility to cater to various types of online businesses.

Excelling in PrestaShop Development: Best Practices

Despite these challenges, several successful developers have managed to conquer PrestaShop’s complex architecture. How? Through well-defined best practices and the right learning approach. First, comprehending PHP is essential. A sound knowledge of Object-Oriented Programming (OOP) concepts, especially in PHP, makes navigating the PrestaShop codebase a lot simpler. In addition, getting familiar with MVC (Model-View-Controller) design pattern, which PrestaShop uses, can be highly beneficial.

Next, understanding Smarty template engine is crucial for store visual customization and design. And finally, MySQL knacks aid the database operations involved in PrestaShop. Several online resources, tutorials, and community forums are available to assist the learning process. Plus, the community of PrestaShop developers worldwide shares a wealth of knowledge, key insights, and practical solutions to various coding challenges faced during the development process. Southern Web’s platform customization and MyShopAdvisor’s module development are excellent examples of PrestaShop development done right through the understanding and execution of these practices.

From PHP to MySQL: Underpinning Technologies that Drive PrestaShop

The Secret Sauce: PHP & MySQL

Isn’t it astounding how eCommerce has revolutionized the world of retail? One might ponder on the elemental digital technologies that drive these online store platforms such as PrestaShop. PrestaShop, a frontrunner in the eCommerce sector, is fundamentally built on a combination of PHP and MySQL which provide the modular architecture and database management, respectively. PHP, a popular scripting language, is at the heart of PrestaShop’s operations. It allows for great flexibility and customization which are key requirements for eCommerce stores. It enables the creation of dynamic content and hence, caters well to the interactive nature of online shopping. On the other hand, MySQL, forms the data bedrock of PrestaShop. It is responsible for structuring and managing the plethora of data generated by online commerce activities.

The Core Challenge: Balancing Performance & Scalability

Clarity on the underpinning technologies unravels the challenges experienced in managing eCommerce platforms. PrestaShop’s use of PHP and MySQL calls attention to a persistent issue: balancing performance with scalability. The inherently dynamic nature of PHP, while promoting interactive content creation, can become a hurdle in achieving optimum performance levels. The more customized and flexible a site becomes, the more server power it demands. MySQL also presents daunting challenges while managing complex data structures. With the increasing volume of eCommerce transactions, data load can lead to decreased performance levels and therefore, must be skillfully managed to maintain system efficacy.

Strike Gold with Best Practices

How then, can we navigate these challenges and harness the robustness of the PHP-MySQL combination to our advantage? The key lies in best practice adaptation. For PHP, implementing efficient coding standards is paramount. Use of PHP Accelerators for compiling scripts in bytecode is one such practice, which can enhance performance. Adopting modern PHP frameworks such as Symfony can also provide sturdy, scalable solutions. Similarly, proper utilization of MySQL’s powerful features is essential. Practices like timely database indexing, query optimization, and efficient schema design can help in maintaining performance while handling complex eCommerce data. Moreover, many PrestaShop themes and modules are designed with consideration for these issues, providing a level of performance optimization out-of-the-box.

Remember, each technology brings its own strengths and weaknesses to the table. The magic lies in wielding them intelligently and effectively, to create a revolutionary eCommerce experience.

Conclusion

Isn’t it fascinating to reflect on the underlying technology that has powered PrestaShop into a leading ecommerce platform? PrestaShop, with its stupendous scalability and customization options, is really a masterpiece built on the foundation of PHP and MySQL. This powerful combination forms the core of PrestaShop, setting it up brilliantly for delivering outstanding online shopping experiences.

Fascinating as these revelations are, this is just the tip of the iceberg. On this blog, we consistently delve deep to unravel the fascinating world of ecommerce and technology platforms like PrestaShop. So here’s a warm invitation to join this exploration by becoming a loyal follower of our blog. Let’s embark on this informative adventure together and unlock the intriguing secrets that make these platforms tick. Our engaging content promises to deliver in-depth perspectives to provide you with the insights necessary to optimize your digital business pursuits.

Looking ahead, we are raring to bring you the latest developments in the world of PrestaShop. Packed with revealing insights, our upcoming posts will make sure you stay at the cutting edge of ecommerce technology. So, hold your breath for what’s next. As the world of technology unfurls new possibilities, rest assured our blog will keep you updated on the most impactful trends and advancements. So, let’s move forward on this intriguing voyage of discovery together!

F.A.Q.

FAQ

What technology stack does PrestaShop use?

PrestaShop is built on the PHP programming language. It also uses SQL for its database management, and Smarty template engine for its templates.

Which database does PrestaShop utilize?

PrestaShop uses MySQL for managing its databases. This is a popular open-source relational database management system that is widely used in web development.

Is PrestaShop built on any specific software architecture?

Yes, PrestaShop is based on the MVC (Model-View-Controller) software architecture. This design pattern separates the application logic into three interconnected components, making the software easier to manage and maintain.

Which template engine does PrestaShop use?

PrestaShop uses the Smarty template engine. This is an open-source web template system written in PHP, which is used to separate application logic and content from its visual representation.

What kind of programming language is used in the development of PrestaShop?

PrestaShop is mainly developed using PHP. PHP is a popular general-purpose scripting language especially suited to web development, providing flexibility and simplicity in coding.

How do I create a free product in WooCommerce?

Have you ever wondered how to create a free product in WooCommerce? Are you curious about the benefits this could bring to your online store? Or are you simply looking for ways to incentivize customers to purchase more? The world of WooCommerce offers a vast number of customizable options, making it a well-liked choice among businesses both large and small. Including the creation of free products to entice customers is one such feature to explore.

However, a study published by Springer has shown that many small businesses struggle to effectively leverage WooCommerce’s full potential, often due to a lack of familiarity with the platform’s more intricate features, such as creating free products. A similar report by Shopify highlights the same issue, illuminating that most store owners underuse many valuable features because they simply don’t know how. The absence of user-friendly instructions contributes significantly to this problem. Hence, there is a growing need for comprehensive guides that can provide entrepreneurs with the knowledge they need to fully exploit the capabilities of WooCommerce.

In this article, you will learn the step-by-step process of setting up a free product on your WooCommerce platform. Not only that, but you’ll be guided through the rationale behind offering such products and how it could potentially lead to a higher customer conversion rate. Additionally, the article will explore ways to strategically implement this feature into your business model to spur more significant results.

Ultimately, this detailed guide aims to offer a straightforward, easy-to-understand method for setting up free products on WooCommerce. With this knowledge in hand, you’ll be better equipped to maximize your online store’s potential, increase conversions, and boost overall profits. So, whether you’re just starting with WooCommerce or looking to refresh your existing knowledge, this article promises a wealth of valuable insights.

How do I create a free product in WooCommerce?

Definitions and Meaning: Setting Up a Free Product in WooCommerce

WooCommerce is a popular WordPress plugin used for creating online stores. It provides features to add, modify, and manage products easily. One key feature is the ability to set up a free product.
Free product means offering a product at no cost to the customer. This is often used for promotional activities or as a part of a larger marketing strategy.
Creating a free product involves a process of configuring the product price to zero in the WooCommerce setup. This process doesn’t require advanced technical skills. Instead, it can be done within the ‘product data’ section of a new or existing product on your WooCommerce site. Setting up a free product can be an effective way to attract new customers or make regular customers feel valued.

Unlocking the Power of WooCommerce: The Ultimate Guide to Creating a Zero-Cost Product

Creating a free product in WooCommerce is a straightforward process that requires applying certain configurations in WooCommerce settings. The designation of a zero-cost product can serve various business purposes such as promotional campaigns, product sampling, or charity. This cycle basically enhances customer engagement by allowing them to familiarize themselves with the product before deciding to make a purchase.

Creating the No-Cost Product

The first step to create a free product is accessing the WooCommerce product data settings. Go to your WordPress dashboard and click on the Products tab. Click ‘Add New’ and input all the necessary information about the product. You will need to provide a product name, a detailed product description, and an appropriate product category.

Next, you’ll navigate to the Product Data dropdown box. This is where you’ll change the price settings. Simply leave the regular price box empty and set the sales price as 0. This will make the product appear as ‘free’ on your WooCommerce store. The system automatically prioritizes ‘sale price’ over ‘regular price’ when both are filled in, making this an ideal solution for temporary promotions.

Listing and Appearance Settings

Once the product pricing configuration has been accomplished, it’s time to ensure your free product is easy to find on the platform for your potential customers. Modify the listing and appearance settings to optimize visibility and customer interest.

  • Assign tags to the product for seamless searchability.
  • Add appealing images of the product to draw potential customer interest. Use multiple angles and environments to provide context to the product’s use or function.
  • Select an appropriate product category, or choose to feature prominently on the product page.

Understand that transparency is key in building customer trust thus, clearly indicate all relevant details including the absence of hidden charges, and your policy on handling, shipping, and return costs.

While creating a free product in WooCommerce is a fairly simple task, satisfying potential customers requires a bit more finesse. It’s not just about making the product free, but how you present it to the customers and the value it imparts to their shopping experience. Remember to maintain an accommodating and informative customer service to handle inquiries and concerns about your free product offerings.

Harnessing the Art of Freebies: Step-by-step Guides on Setting Up a Free Product using WooCommerce

Creating a ‘Zero Cost’ Commodity: How and Why?

Is there, in truth, such a thing as a ‘free lunch’? Yes, with WooCommerce. This versatile e-commerce platform allows businesses to offer complimentary products or services, not as an act of charity, but as a strategic tool to enhance customer loyalty and product visibility. Many successful online stores harness the power of complimentary items to lure in customers and eventually lead them to their premium products.

A key aspect to keep in mind is that these freebies do not indicate a lack of value. On the contrary, these no-charge items can serve as an effective engagement, retention, and marketing strategy. The real trick lies in ensuring the ‘freebie’ is strategically placed within the buyer’s journey, enticing them to browse more and eventually make a purchase.

Navigating the Challenges of Offering a Complimentary Product

The process of creating a freebie on WooCommerce is not arduous, but it does come with problems that could dampen the overall shopping experience. An improperly set up complimentary item could lead to errors such as the product being added to the shopping cart indefinitely, creating confusion and frustration among customers.

Furthermore, if the checkout process for this no-cost item is not streamlined and straightforward, it may dissuade new users who might misunderstand the steps and consider it an overly complicated process. An easy-to-understand interface is key. Therefore, it is essential that these potential bungles are avoided to ensure a seamless shopping experience for the customer.

In-practice Ideas: Seamless Execution of Free Items

Several online stores that use WooCommerce have successfully tackled these problems, resulting in an effortless execution of their strategy. Let’s consider the clothing retailer ‘Alley Fashion’; they offer a free branded tote bag with every purchase above $50. To set this up, they simply marked the product price as $0 in the product data section. However, they added a conditional clause that this product only appears after a shopper has committed to purchasing items worth at least $50.

In another example, ‘Lux Reads’, an online bookstore, offers a free e-book with every first purchase. To set this up, they created the e-book as a regular product but marked its price as $0. At the checkout step, first-time users automatically have this free e-book added to their cart, enhancing their overall shopping experience and giving them a taste of the premium offerings awaiting them in the future.

Reigning the eCommerce Game: Valuable Tips for a Successful Free Product Offering via WooCommerce

A Covert Thrust into Consumer Behavior

Ever wondered why businesses are willing to give away their products for free? This concept goes beyond mere generosity. It is a strategic move to reign in the e-commerce game, notably via WooCommerce. WooCommerce, a free WordPress plugin, allows online businesses to sell anything while providing complete control to the web store owners. A free product offering can be of great value in achieving several businesses’ goals. It could serve as a fantastic marketing tool to attract more customers, increase overall sales volumes, introduce new products, eliminate stock, and build consumer preference or brand loyalty in the long haul.

Deciphering the Main Challenge

The primary hurdle lies in the effective execution of the free product offering strategy. Offering products for free may seem like a loss-making proposition to the business. Still, it couldn’t be further from the truth because such a tactic could reap more significant benefits when executed smartly. Strategizing the implementation of giving away free products is crucial. It includes determining what products to give out for free and to whom, setting up the free products on WooCommerce, utilizing efficient shipping methods, optimizing promotional practices, and ensuring you’re not violating any laws or regulations.

Successful Implementations in the Market

Several businesses have aced the art of free product offering. For instance, makeup companies often give away free samples of their new products to their loyal customers. This approach not only serves as a wonderful way to introduce a new item but also entices customers to buy full-sized versions if they like the samples. Similarly, countless online educational platforms offer some classes for free or let you start a trial period without any cost. These examples showcase how free offerings can be used strategically to increase customer engagement, broaden client base, and enhance overall sales volume.

All in all, offering free products via WooCommerce can be a valuable marketing maneuver when executed thoughtfully and strategically. It may seem challenging at first, but with careful planning and execution, businesses can leverage it to their boon while ruling the e-commerce game.

Conclusion

Have you ever pondered the impact that offering a free product could have on your business? Indeed, in the world of eCommerce, providing free products can serve as one of the most effective strategies to usher in a rise in your customer base and boost your online sales. With WooCommerce, such a feat not only becomes plausible but also relatively simple. A rich set of steps laid out in the article have uncovered the process of creating a free product listing in WooCommerce. The implementation of this strategy can prove instrumental in building healthy customer relationships and driving future purchases.

Having read through this blog post, it’s our hope that you’ve gained the knowledge and confidence to integrate this effective marketing tool into your stock of business strategies. We earnestly encourage you to keep abreast with our rich content so as to help you unearth more insightful tips and remaining at the fore of your industry. Besides, our content is always designed to cater to your unique needs and challenges, offering in-depth tutorials and guides. Henceforth, be sure to stay tuned and connected to our blog.

As we head into the future, there’s a lot to be excited about! We are continuously on the look-out for contemporary eCommerce trends and the best strategies to revolutionize your business operations. Considering this, your anticipation for our upcoming blog posts is not in vain! We always strive to deliver relevant and impactful content that empowers our readers to make informed business decisions and maintain their competitive edges. Not only will our forthcoming releases tackle various aspects of WooCommerce, but they’ll also delve into other platforms and business strategies. So don’t miss out! Ensure you’re connected with us to be the first to know about our new releases. Hold your breath for more insightful content designed to equip you with the knowledge to steer your business towards unrivalled success.

F.A.Q.

1. How can I define a new product in WooCommerce?
In order to create a new product in WooCommerce, navigate to the Products section and click ‘Add New.’ You’ll then be able to input the relevant product details such as name, description, and images.

2. How can I set a product’s price to zero?
After the product has been defined, set the Regular Price field under the Product Data – General tab to zero. This makes the product free of charge.

3. How can I ensure the free product shows as ‘Free’ instead of ‘£0’?
You can download and install the WooCommerce Price Display plugin which alters the way WooCommerce displays free products. It will reword the price to ‘Free’ instead.

4. Can I set a limit to the number of free products a customer can add to their cart?
Yes, you can set a maximum quantity for your free product by going to the Inventory tab under the Product Data section. This will allow you to control how many units of the free product customers can add to their carts.

5. Can I schedule a sale for the free product, in case I want to charge for it later?
Yes, by using the Schedule option under the Product Data – General tab, you can set specific dates for the free product to later revert back to its original price or a sale price.

How to create a website in Magento 2?

Have you ever wondered how to create dynamic and robust e-commerce websites? Are you curious about the processes and complexities being Magento 2 e-commerce web design? Does the thought of trying a hand at Magento 2 to design your own site intrigue you? If yes, then you have landed at the right place, as we have interesting insights to share.

Creating a digital platform is no longer a luxury; it’s a necessity for businesses. According to a report by Forrester Research, the US e-commerce sector alone will see a growth rate of up to 9.32% annually through 2024. However, not many businesses possess the necessary knowledge or skills to create a proficient website. A study by IBIS World revealed a steady demand for web developers, as many businesses lack the internal capabilities. In the quest to address this concern, the use of Magento 2 as an all-encompassing solution for e-commerce web design has gained popularity.

In this article, you will learn how to master the art of web design using Magento 2 as your tool. We will provide you with a stepwise guide that not only elaborates on the initial set-up requirements but also gives an in-depth understanding of themes, plugins, and custom-coding. Additionally, instructions on how to manage products, orders, payments, and shipping configurations will also form a part of this comprehensive guide.

With the help of this article, we aim to simplify the complex world of Magento 2 for beginners as well as experienced coders. Stay with us to unravel the secrets of creating a user-friendly e-commerce website that will drive your business growth.

How to create a website in Magento 2?

Key Definitions in Creating a Website in Magento 2

Magento 2 is an updated version of Magento, an open-source e-commerce platform. It is used to build online storefronts where sellers can display and sell their products. Creating a website in Magento 2 involves installing the Magento 2 software, designing the visual look of your website, configuring your store’s settings, and adding your products.

Open-source means the software’s source code is freely available to the public, allowing anyone to modify and improve it.

E-commerce stands for electronic commerce, which involves buying and selling goods or services online. It is the backbone of any online storefront.

Unleashing the Magic: Harnessing Magento 2 to craft an Impressive Website

Understanding Magento 2’s Powerful Features

At the core of an impressive website lies exceptional functionality and ultimate user-experience – two aspects that Magento 2 excels at delivering. Ever since its inception, Magento 2 – a robust and scalable open-source eCommerce platform – has been empowering businesses worldwide to create websites that are visually stunning, highly functional, and offer unparalleled user experiences. Its rich out-of-the-box features, extensive customization capabilities, third-party integrations, and SEO-friendly design are some of the reasons why businesses, big and small, prefer Magento 2 over other platforms.

One of the outstanding features of Magento 2 is its modular architecture that allows developers to enable or disable specific components according to the business requirements. This leads to significant flexibility in customization, making it easier to tailor the website according to the brand’s identity and needs. The robust caching system, full-page caching built into the platform, and Varnish Cache support all play pivotal roles in boosting the website’s performance, thereby engendering a seamless shopping experience for users.

Mastering the Art of Website Creation with Magento 2

The process of creating a website with Magento 2 starts with the installation of the platform, which involves downloading the Magento software from the official site, setting up a database for Magento, running the Magento Setup Wizard, and configuring the server and PHP. Though the setup process may seem intimidating at first, carefully following the official Magento documentation can make the process infinitely more manageable.

  • The next crucial step is theme selection and customization. Magento 2 brings to the table myriad responsive themes, both free and premium, that can be chosen to match the brand aesthetics. Each theme can be customized extensively, allowing businesses to design unique and engaging user interfaces.
  • Then comes the all-important task of adding products. Magento 2 allows comprehensive product information management, including descriptions, images, prices, and other product-specific attributes. It also facilitates creating different types of products – simple, virtual, configurable, bundle, or grouped products, giving businesses ample flexibility in showcasing their offerings.
  • Setting up payment and shipping methods is a key operation that Magento 2 simplifies. With its ability to integrate with leading payment gateways and shipping carriers, Magento 2 supports a wide array of payment and shipping options, thereby making transactions smooth for the customers.

From installation and configuration to theme selection and customization, adding products, and setting up payment and shipping methods – Magento 2’s powerful and flexible features make it a cinch to create and customize an impressive website. Harnessing the magic of Magento 2, businesses can craft a website that is both visually appealing and exceptionally functional, providing a superlative user experience all-round.

Untold Secrets of Magento 2: Your Comprehensive Guide to an Incredible Website Development

The Intricacies of Magento 2 Web Development

Is Magento 2 the right platform for creating your website? For those who may not have heard about it, Magento 2 is a leading eCommerce platform that offers a diverse range of features tailored to support businesses of all sizes. Its versatility arises from its open-source nature – it allows developers to tweak its code as per their needs. This web development platform, equipped with high customization options, is a secret weapon to develop an awe-inspiring business website that can scale as per growth requirements.

Magento 2 also gives developers the scale of adding multiple extensions available on the marketplace. They can bring enhancements in the website’s functionality by integrating third-party devices, like payment gateways and shipping applications. The platform also supports numerous languages and currencies, thus making the websites apt for global deployment.

Tackling Challenges in Magento 2 Web Development

Navigating the intricate landscape of Magento 2, however, can be a daunting task for beginners. Its complex design structure demands an advanced understanding of eCommerce applications. One major impediment that developers often face is upgrading Magento 2’s version. Given the platform’s rapid development cycle, consistent upgrades are required for optimal performance. But each upgrade requires careful planning to prevent the disruption of website operations, which many developers struggle to avoid.

Moreover, optimizing the website for enhanced speed and compatibility across different devices can be labor-intensive. Although Magento 2 is well-known for its flexibility, achieving optimal website performance requires developers to understand the platform’s intricate conventions for code optimization.

Adopting Best Practices for Magento 2 Website Development

Despite these challenges, several successful websites designed with Magento 2 stand testament to the platform’s capabilities. The key to harnessing Magento 2’s full potential lies in knowing and following the best practices. For instance, to deal with the challenge of version upgrades, developers should maintain a separate staging environment. Here, the compatibility of the modified features can be tested with the new version before rolling out on the main website.

Another best practice lies in regularly optimizing the website for performance. Actions like merging and minifying JavaScript and CSS files, optimizing images for the web, using advanced caching methods and configuring Content Delivery Networks (CDNs) promote enhanced website speed.

Additionally, considering the increase in mobile traffic, making the website mobile-friendly should be a top priority. Responsive design settings offered by Magento 2 ensure that the eCommerce store appears correctly on various devices, thus enhancing user experience.

In conclusion, if navigated with care and understanding, Magento 2 can truly be a resourceful tool in a developer’s arsenal. Its high customization capacity and diverse features place it as one of the foremost eCommerce platforms in today’s digital era.

Breaking Down the Walls: Experiencing Unprecedented Ease in Website Creation with Magento 2

Is Building a Website Really That Simple?

One may ask, is constructing a website indeed as simple as many claim? The answer is a resounding yes, particularly when using Magento 2. The platform’s dynamic capabilities and powerful features make it supremely easy to design custom websites without any considerable coding expertise. The key to this convenience lies in Magento’s user-friendly interface which ensures that users, even those without a tech background, can easily navigate and use it to create a website. Just remember to choose the option that best fits your skill level – whether that’s utilizing the guided setup for beginners, selecting pre-made templates perfect for those with intermediate skills, or fully customizing your site using HTML and CSS if you are an advanced user.

Demystifying Complexities

But like any good thing, building a website using Magento 2 is not entirely without complexities. The platform offers a diverse range of features which, while extremely beneficial, can sometimes overwhelm new users, causing them to struggle unnecessarily or fear that they need extensive coding knowledge to create their website. Here, the problem is generally not with the capability of Magento 2, but rather with the user’s initial apprehension. Overcoming this hurdle requires understanding that Magento 2 is designed to be user-friendly. By taking the time to explore its different features, one can ease into using the platform more comfortably and confidently.

Success Stories in Website Creation

Many have realized their dreams of owning a website thanks to Magento 2. For instance, a popular clothing company successfully migrated their online store to Magento 2, optimizing their customer journey, enhancing their eCommerce capabilities, and significantly increasing their sales. They did this by effectively utilizing the multitude of features that Magento offers, such as the simple-to-use shopping cart system and mobile-friendly configuration. Another small business owner, with zero website creating experience, used Magento’s ready-made themes to launch an attractive, easy-to-navigate website that boosted his online visibility and customer reach.
In both of these examples, the key to success was taking advantage of Magento 2’s superb features, while keeping the website’s purpose and consumers’ needs at the core of the design process.

Conclusion

Could there be a more empowering tool than Magento 2 to build your online e-commerce store? As we’ve discussed, Magento 2 is indeed a comprehensive solution for your e-commerce needs, offering versatile and customizable features that can set your online store apart from the competition. Its broad range of plugins and extensive flexibility extends your creative boundaries and allows you to implement the most intricate functionalities with ease. Moreover, its SEO-friendly nature boosts your site’s visibility in search results and enhances customer engagements.

We want to ensure that you are able to develop a functional and robust website in Magento 2, and we believe that our blog has the essential resources and guidance you need. Hence, we encourage you to consistently follow our blog posts for more enlightening content related to website development, e-commerce, and of course, Magento 2. Leverage the provided step-by-step guidelines and high-value tips to make your journey with Magento 2 as smooth as possible.

Further, remember that with every new update of Magento 2, there comes a myriad of new features and improvements. These changes often bring new efficiencies, security enhancements, and quicker ways of doing things. Hence, there’s always a lot to look forward to. So, stay tuned to our blog for new releases and updates on Magento 2 which, no doubt, contributes significantly to your website’s overall progression. Embrace the exciting possibilities that come with Magento 2, and explore the uncharted waters of e-commerce website creation with confidence.

F.A.Q.

Q1: What is the first step in creating a Magento 2 website?

A: The first step in creating a Magento 2 website is to install Magento 2 on your server. This is done through the command line or by downloading the pack from the official Magento website and uploading it to your server.

Q2: How to configure my new Magento 2 website?

A: Once you’ve installed Magento 2, you can configure your website using the Admin Panel. This involves setting up your store information, shipping methods, payment methods, and design theme.

Q3: How can I add products to my Magento 2 website?

A: Products are added through the Admin Panel’s Catalog option. You can add the product’s details, images, and set the inventory level for the product here.

Q4: How to set up a theme for my Magento 2 website?

A: Magento 2 allows you to install a variety of themes through the Magento Marketplace or from third-party providers. Once the theme is installed, you can apply it to your website using the ‘Content’ section in your Admin Panel.

Q5: How can I make my Magento 2 website live?

A: Once you’re satisfied with the setup, you can make the website live by choosing the ‘Production Mode’ in the system configuration settings. Remember to thoroughly test your site before going live to ensure everything is working as expected.

Where are WooCommerce templates?

Where can one find WooCommerce templates? How can they be utilized effectively? What are the potential issues and solutions surrounding this topic? These questions often arise in the minds of entrepreneurs and business owners using WooCommerce for their eCommerce sites.

According to a report from BuiltWith, an Internet research firm, and a study published by WPBeginner, a popular WordPress reference site, finding and implementing the right WooCommerce templates remains a significant challenge for many. Both reports highlight concerns about the availability of user-friendly, customizable, and feature-rich templates, which are essential for building brand identity, optimizing user experience and conversion rate. A survey conducted across various states in the USA has collected a significant number of customer frustration over the time consumed in finding the right template and customization issues. This underlines the necessity for a comprehensive guide that can assist users in navigating through this process seamlessly.

In this article, you will learn everything you need to know about WooCommerce templates. From where to find them, how to choose the ideal one for your eCommerce site, to customizing them and overcoming potential challenges; this tutorial aims to be a one-stop solution for all your questions and concerns on the subject.

Furthermore, we will discuss real examples, tips and tricks from experts in the industry, and what the future holds for WooCommerce templates. As the eCommerce market continues to evolve rapidly, staying ahead of the latest trends in WooCommerce design can give your online business a competitive edge.

Where are WooCommerce templates?

Basic Definitions Related to WooCommerce Templates

WooCommerce templates are specific types of file designs or themes used in WooCommerce, an open-source ecommerce platform for WordPress. In simpler terms, these templates help in shaping the homepage, product page, checkout page, and other ecommerce sections of a website built on WooCommerce by influencing the appearance and layout.
WordPress on the other hand is a content management system that allows users to create and manage websites easily without any advanced technical knowledge. It is the fundamental structure on which WooCommerce works.
The open-source platform, which is what WooCommerce is, implies that this software’s source code is available for anyone to view, inspect or modify, allowing significant room for customization.

Unveil the Mysteries: Everything You Need to Know About WooCommerce Templates.

Understanding WooCommerce Templates

WooCommerce templates provide an easy way to create or modify the various pages of a WooCommerce website. These pages can include product listing pages, product description pages, cart pages, and checkout pages. Essentially, WooCommerce templates are PHP files that dictate the presentation and design of content on your e-commerce website. Their primary function is to render and serve your website’s content to your visitors.

These templates are usually stored within the WooCommerce plugin directory. You can find them by going to wp-content/plugins/woocommerce/templates. But the rule of the thumb is never to edit these templates directly. If you need to make amendments, you can create a folder called “woocommerce” within your theme’s directory, and copy/paste the template file there. You can then apply your modifications to this copied file.

The Different Types of WooCommerce Templates

There are several types of WooCommerce templates that you can utilize to customize your online store optimally. Some of the most common ones include:

  • Single product templates: These templates allow you to manage the appearance of individual product pages. Here, you can customize various elements like product images, descriptions, related products, etc.
  • Shop page templates: These are used to configure how your online shop’s main page or product listing page appears. You can customize aspects such as product grids, sort and filter options, and product categories here.
  • Cart and checkout page templates: These templates let you modify the design and layout of your cart and checkout pages. You can personalize elements like the cart table, checkout form, payment methods, and more.

Tailoring Your WooCommerce Templates for a Unique Storefront

Customization is the key to standing out in the competitive e-commerce ecosystem. Thankfully, WooCommerce templates make it possible to create a unique shopping experience for your customers. With access to the WooCommerce Template Hierarchy, you can modify almost every aspect of your online store, giving you control over the design and functionality of your product pages, cart, and checkout process.

It’s also important to mention the role of child themes in WooCommerce customization. To keep changes from being lost whenever updates are applied, it’s advisable to use child themes. When changes are made to these child themes (which are essentially copies of the original theme), the original files remain undamaged. This way, updates from the theme or plugin creators won’t overwrite or delete the changes that you’ve made.

In conclusion, WooCommerce templates are a powerful tool for any e-commerce business looking to elevate their online store’s look and user-friendliness. By understanding and leveraging these templates effectively, you can create an impressive and functional online store that’s uniquely yours.

WooCommerce Templates: A Hidden Gem in the World of E-commerce.

The Critical Question: Why is it crucial to understand WooCommerce Templates?

What if you had the power to significantly influence your e-commerce store’s aesthetics, functionality, and overall customer experience with just a few tweaks? This power isn’t as elusive as you might think. The not-so-secret answer lies in WooCommerce templates. WooCommerce, a customizable, open-source e-commerce platform built on WordPress, has provided business owners with a plethora of highly versatile templates. These templates act as the backbone of your online store, impacting not just how your store looks, but also how it operates, communicates with customers, and ultimately, how it sells.

The Predicament: Identifying and Understanding the Perfect Template

E-commerce store owners often find themselves in a seemingly impossible situation. With thousands of WooCommerce templates available, selecting the ideal one for your business could become a daunting task. Moreover, it’s a common misconception that a template only affects the visual elements of a website. In reality, a WooCommerce template can dramatically improve your store’s overall functionality, enhance its intuitive user interface, and provide a seamless, hassle-free shopping experience for your customers. So, the predicament lies not just in choosing a template, but in fully understanding its capabilities and potential impact on your e-commerce store.

Exemplary Practices: Harnessing the Power of WooCommerce Templates

A shining example of best practices in utilizing WooCommerce templates can be found in successful online stores such as Porter and York and Root Science. Porter and York, an online butcher shop, utilizes a custom WooCommerce template to focus on high-definition images of their products, thereby visually enticing their customers. Moreover, their template is designed to make the ordering process simple, quick, and easy to navigate. Another successful online store, Root Science, sells skin care products. They make use of their WooCommerce template by dedicating substantial space towards educating their customers about the benefits of their products, essentially using their website as a marketing tool as well as an online storefront.

These prime examples provide powerful insights into how online stores can harness the potential of their WooCommerce templates to enhance both the aesthetic and functional aspects of their store, ultimately driving customer engagement and boosting sales. Using WooCommerce templates wisely and to their full extent can genuinely elevate an average online store to an extraordinary one. Therefore, WooCommerce templates aren’t just a hidden gem – they are the gleaming crown jewel in the world of e-commerce, waiting to be discovered and utilized to its full potential.

Journey into the Heart of WooCommerce Templates: Discover Their Potential.

Probing the Depths of WooCommerce Templates

What do you think brings the unique look and feel to your WooCommerce storefront? The answer lies in WooCommerce templates. These powerful tools play a considerable role in defining not only the storefront’s aesthetic appeal but also its functional aspects. WooCommerce templates act as the building blocks for your online store, influencing its design, layout, and overall user experience. Predominantly written in PHP and HTML, these templates offer an exceptional level of customization.

When you dive into the world of WooCommerce templates, you’ll discover that they are responsible for every aspect of your storefront, right from your product listings to shopping cart and checkout. You get to decide elements such as the style of your product categories, the arrangement of products, and the look of your individual product pages. The potential is unlimited, opening a world of possibilities for seasoned developers and even beginners with a basic knowledge of PHP and HTML.

Addressing the Challenges Connected with WooCommerce Templates

However, there lies a challenge when it comes to harnessing the full potential of WooCommerce templates. With the myriad of options at your disposal, discerning how each template functions and the role they play can be an uphill task. Also, with the constant updates in WordPress and WooCommerce, staying abreast with the changes and ensuring compatibility may add to the challenges.

One major aspect is overriding WooCommerce templates. Most themes integrated with WooCommerce tend to override its templates, changing the original look, and feel of the online store. While this presents an opportunity for customization, it can sometimes lead to issues if not managed correctly. Not understanding how to override correctly can result in an inefficient and nonfunctional online store.

Showcasing Best Practices on WooCommerce Template Utilization

So, how can one optimize the use of WooCommerce templates to create an engaging and fully functional online store? Let’s dive into some of the best practices. First and foremost, understanding the WooCommerce Template structure is vital. Familiarize yourself with the role of each template and how they facilitate your online store’s functionality.

Knowing how to correctly override WooCommerce templates can work wonders. You have the option to override them in your theme for customization. For instance, you’d want to override the product template if you desire to customize your shop’s product layout. You may consider creating a WooCommerce directory in your theme and copying the template files you wish to modify to ensure the correct overriding.

Moreover, regularly updating your themes and templates is crucial. It assures compatibility with the latest versions of WordPress and WooCommerce. Lastly, getting expertise support or outsourcing skilled developers could also be a viable option, especially for beginners or those unfamiliar with PHP or HTML. These practices ensure an efficient and smooth-running WooCommerce storefront, proving the true potential of WooCommerce templates.

Conclusion

Ever considered where the heart of your WooCommerce website lies; its entire look and feel? It is deeply rooted in its templates, which give the desired design and layout to your online shop. WooCommerce templates are like the DNA of your eCommerce site; they decide how each element of your site will be displayed. Location of these templates is crucial yet unfamiliar to many. It’s typically within the plugin directory in WordPress under the path ‘wp-content/plugins/woocommerce/templates/.’ The great thing about WooCommerce templates is their customizability and flexibility offering retailers a unique platform to showcase their products and services.

Keeping the pulse on this blog can be truly beneficial if you aim to master your eCommerce presence. We make swift updates and provide tips and tricks on navigating the WooCommerce ecosystem effectively. We are constantly striving to bring you the most comprehensive information about WooCommerce, its features, and how to maximize its utilities to accelerate your business growth. Being a regular part of our readership community will ensure you stay in tune with new updates, enhancements, and more in the realm of WooCommerce.

Anticipate blog posts unveiling empowering information about WooCommerce, its new releases, and much more. We have some truly insightful content lined up which will bridge the gap between your queries and solutions. We understand how important it is to stay updated in such a dynamic environment where every moment counts. So, hold on to your excitement as we gear up to bring to you a plethora of information that is certain to enrich your knowledge and skillset manifold. Be ready to unveil the magic and power of WooCommerce and its templates in the forthcoming blog posts.

F.A.Q.

1. Where can I find WooCommerce templates?
You can find WooCommerce templates within the WooCommerce plugin itself in a folder named ‘templates’. Alternatively, many WooCommerce-compatible themes provide specially-designed templates, which can be found within the themes’ folders.

2. Can I customize WooCommerce templates?
Yes, WooCommerce templates can be customized to meet your specific needs. However, direct changes to the template files can be lost during plugin updates, so it’s often safer to create overrides within your theme’s folder.

3. How do I install a new WooCommerce template?
Installing a new WooCommerce template depends on where the template file is coming from. If it’s included in a new theme, installing and activating the theme will also install the template. If the template is a standalone file, it can be added to the ‘woocommerce’ folder within your theme’s directory.

4. Are all WordPress themes compatible with WooCommerce?
Not all WordPress themes are compatible with WooCommerce. You need to choose a theme that has been designed with WooCommerce in mind or a general eCommerce theme that has specified its compatibility with WooCommerce.

5. Do I need coding knowledge to work with WooCommerce templates?
While some knowledge of PHP, CSS, and HTML can be helpful when creating custom WooCommerce templates, many themes provide options for simple, code-free customizations. There are also various plugins and online resources that can help you customize WooCommerce templates without coding.