Is the template app free?

Is the template app completely free? How do the cost implications affect users? Are there hidden charges one ought to know? These questions are vital as you navigate the tech-world. The use of template apps has seen exponential growth over recent years. However, the question of affordability and hidden charges often leaves many puzzled. Therefore, it’s essential to enlighten readers seeking to exploit the benefits of template apps regarding this matter.

The cost implications associated with template apps have become a significant concern among users globally. For instance, a study by the Pew Research Center showed an increased number of Americans showing discontentment over unexpected costs on these apps. Additionally, TechCrunch highlighted the prevalence of hidden charges within ‘free’ template apps as a growing issue in the tech industry. Therefore, I propose an in-depth examination of these apps, focusing on the costs, to provide users with a clear understanding of what they’re getting into. Such an initiative could help resolve this problem, indicated by a recent US survey where a majority of participants expressed interest in detailed reviews focusing on app costs.

In this article, you will learn about the intricate details involving the use of template apps, focusing on the costs. You will gain insights into how different apps present their pricing models, and how to navigate any hidden charges. We will also delve into the legality of these charges and help you understand your rights as a user.

Furthermore, we will discuss various surveys and studies that have been conducted on this topic, particularly those originating from the United States. By the end of the article, you should be able to make an informed decision on choosing a template app that suits your needs and budget.

Is the template app free?

Definitions and Meanings of ‘Template App’

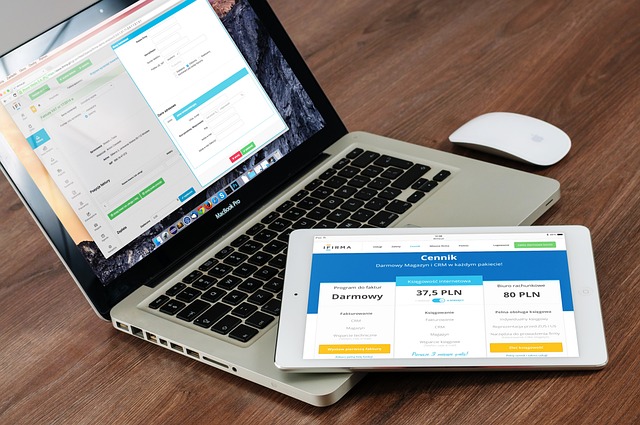
A template app is a predefined, configurable software application that users can customize according to their specific needs without any programming skills. It’s like a readymade structure that helps users to create their own applications more conveniently.

Free template apps are those which do not charge users for usage or access to primary features. Most of the time, they’re monetized through in-app purchases, advertisements, or offering premium versions for advanced features. However, free template apps might have certain restrictions, such as limited customization options or requiring attribution.

Remember, the term ‘free’ often refers to the monetary cost, but one needs to consider other ‘costs’ such as privacy risks and data consumption.

Unmasking the Reality: Is the template app really free?

When it comes to the cost behind ‘free’ template apps, many factors play an integral part. Many individuals mistakenly believe that free template apps don’t carry any real costs. However, this is far from the truth.

The Upfront Cost is ‘Zero’ but What About the Other Costs?

One of the main lures of free template apps is the zero upfront costs to download and install, which meets the immediate needs of a business startup. However, there is a potential price to pay for this crutch solution. The most notable one is the cost related to advertisements. Being free, these apps aim to monetize their operations by featuring ads which can disrupt the user’s experience or even drive away potential customers.

The time it takes to customize these template apps to meet a business’s specific needs is another cost to consider. These apps typically offer limited functionality and customization options, and expanding beyond these boundaries demands substantial amounts of time and possibly consultancy fees from experts.

The Hidden Costs of the Upkeep and Maintenance

Then comes the cost of maintaining the app. Identifying and addressing app-related issues can become a time-consuming process, which in turn incurs additional costs. Moreover, there can be limitations on tech support offered by free apps, leaving you to sort out any issues that might arise.

Further, one is bound to the updates, changes, and rules set by the app creator. The lack of control can be detrimental to business continuity and growth. Enterprises would need to rework their operations each time the app undergoes a major update or modification, leading to inefficiencies, wastage of resources, and potential downtime.

  • Ad costs: Free apps display ads, disrupting customer experience and potentially driving them away
  • Customization costs: Modifying apps to suit business needs often requires a lot of time and potential consultancy fees
  • Maintenance costs: Identifying and fixing issues can get expensive, especially with limited technical support
  • Update costs: Adapting to changes or updates enforced by the app creator may result in operational inefficiencies and potential downtime

To conclude, while free template apps tend to seem attractive at first glance, they could carry hidden costs. These costs are not usually apparent but can gradually accumulate to a significant amount over time. Hence, it’s crucial to consider these aspects when opting for a ‘free’ template app for your business.

Diving Deep into the World of Free Template Apps: Unveiled Secrets

Is There Such a Thing as a Free Lunch?

Have you ever stopped to consider the true cost of a free app? It’s a tantalizing offer, a fully functional application at no financial investment. However, consider the implementation of ad scripts, in-app purchases, or tiered levels of functionality? Free template apps lure you in with no initial costs, but is it all too good to be true? The key idea is the concept of hidden costs. The money you save up front may soon drain away in maintenance, limited features, and time expenditure. A free app is an attractive proposition, but the real price may not always be in dollars and cents.

Scratching Below the Service

The main problem with free apps is that they come with strings attached – hidden costs that aren’t always immediately apparent. They might result in spending more resources than a premium app. Factors such as lost productivity due to the learning curve for a non-intuitive user interface, the cost of implementing workarounds for missing features, or third-party advertising posing potential security threats, can all add up to a hefty price tag. Moreover, limited customer support and frequent bug issues can turn a bargain into a burden. While it might be free on a monetary basis, it can cost you in productivity, efficiency, or system integrity.

Walking the Cost-Efficiency Tightrope

Rather than making a beeline for free apps, best practice recommends a thorough cost-benefit analysis before choosing a template app. Several businesses stand as testament to this practice. Company A, for instance, replaced a free project management app with a premium version, resulting in fewer technical glitches thus increasing productivity. Company B learned the hard way when their free CRM failed to sync with other apps, costing valuable time, before switching to a modestly priced, more integrated system. Another shining example, Company C, bolstered their data security by opting for a known paid app over a free alternative, saving potential financial risk from data breaches. These cases highlight the importance of considering long-term implications over short-term savings. Free doesn’t always mean hassle-free.

Why ‘Free’ Template Apps May Not be Truly Free: A Closer Examination

Is Free Truly Free?

Everyone loves the idea of getting something for nothing. Who wouldn’t want to have access to powerful tools and beautiful designs without paying a single dime? But is it really free? In the world of apps and software, ‘free’ can be a very subjective term. The reality is that even ‘free’ template apps come with a price. In some cases, it may not be monetary but there could be other trade-offs that the users need to compromise on like time, quality, features, privacy, or even ownership rights. The key idea here is that while these tools may not require upfront payment to acquire or use, they covertly extract value from end-users in other ways.

The Devil is in the Details

The main problem with these ‘free’ templates is that they are often of lower quality than their paid counterparts. Sure, they look great on the surface, but once you start using them, their limitations begin to surface. You may find that customization options are limited or not available at all. In other cases, the app might be littered with ads that disrupt your user experience, or worse, infringing upon your privacy. Plus, ‘free’ apps rarely come with reliable customer service. This means that if you encounter problems or need help, you are largely on your own. Even if you’re technically savvy, this can eat up a lot of your time and cause frustration.

Case Studies in Value

Take for example GSuite’s collection of productivity apps. While free to use, they do come with limitations such as lower storage capacities and fewer features than the premium version. However, they offer stable and reliable performance, a clean user interface, and respect the user’s privacy. Another example is web development platform, Wix. The ‘free’ version allows you to create and publish a website but with its brand’s ads displayed on your site. An upgrade to a premium plan is required to remove these ads. Despite these limitations, these companies have created best practice examples in the industry. They have managed to strike a careful balance between the give and take, offering users a functional, albeit basic service that’s truly free, while also providing an option to access more advanced features for a fair price. This maintains the user’s trust, ensures a positive experience and motivates upgrades to paid services.

Conclusion

Have you ever stopped to ponder on the accessibility and affordability of digital tools such as the template app? Many of us leverage the benefits of these applications regularly, but seldom do we genuinely reflect on their cost implications. The template app, undeniably, offers great utility and ease in designing and organizing content, which significantly empowers individuals and business enterprises. Despite its enticing features, the app is in fact not free, subtly presenting itself as a valuable investment more than an outright expense.

While certain basic elements of the application might be available at no cost, they tend to offer limited capacity and features. To unlock the full potential and take advantage of the comprehensive services, users must typically subscribe to a payment plan. Despite this, it’s important to remember the incredible convenience and productivity enhancements the template app brings, ultimately paying for itself in the time, effort, and resources it saves. With an array of sophisticated templates, customizable functionalities, and user-friendly interfaces, it surely comes across as a beneficial tool.

We sincerely hope you enjoy reading our blog and find immense value in it. Our goal is always to keep you updated with the latest advancements in technological tools and applications. Eager to learn more about upcoming releases and significant updates? Stay tuned! We encourage you to follow our blog and trusted platform for reliable, timely, and insightful content. We promise to keep you abreast with the fascinating world of technology, ensuring you are always one step ahead. Your anticipation and patience for our latest releases, we guarantee, will indeed be rewarded. Remember, good things come to those who wait!

F.A.Q.

1. Is the template app available for free?
Yes, the template app is available for free. It can be downloaded from the app store or the brand’s official website without incurring any charges.

2. Are there any hidden charges involved with the free template app?
No, there are no hidden charges involved with the free template app. However, there might be optional in-app purchases for additional features or functionalities.

3. Is all content accessible in the free version of the template app?
While the basic features in the template app are accessible for free, some advanced features might necessitate an upgrade to a premium subscription. Information regarding what is included in the free and premium versions should be outlined in the app’s description.

4. Will I get updates for the template app even if I’m using the free version?
Yes, updates are provided even to users of the free version of the template app. These often include bug fixes, improvements, and occasionally, new features.

5. Can I switch to a paid version of the template app later?
Yes, you can switch to a paid version of the template app later if you wish to access more advanced features. Within the app, you should find an option to upgrade to the premium version.

How to install custom theme in Magento 2?

Have you ever considered how custom themes can boost your website’s appeal on Magento 2? Can you comprehend the significance of having a unique, personalized theme and how can it foster better customer engagement and improved sales? Have you ever wondered about the challenges regarding installing custom themes in Magento 2 and how to tackle them effectively?

The challenge facing many Magento 2 users with regards to installing custom themes is well documented with authoritative sources such as Magento U and the Magento DevDocs highlighting the complexities involved. These include not only the technical aspects but also the compatibility issues and potential problems such as themes not matching the Magento version. The existence of these issues becomes evident in the survey results from various eCommerce sources within the US. There is an urgent need to demystify the process and provide a streamlined, structured approach to installing custom themes.

In this article, you will unearth the intriguing and multifaceted aspects of installing a custom theme in Magento 2. Boosted by expert insights and simplified instructions, we make it easier to improve your site’s aesthetics and functionality with a custom theme.

We aim to tackle the root of the problem, clarifying the technical processes and removing any uncertainties you may have. With a firm grasp of this knowledge, installing custom themes in Magento 2 will no longer pose an overwhelming task, but instead become an exciting opportunity to enhance your online store’s visual appeal while ensuring smooth functionality.

How to install custom theme in Magento 2?

Essential Definitions for Magento 2 Custom Theme Installation

Magento 2 is an open-source e-commerce platform with flexibility and scope for customization. This platform provides features allowing you to create an online store.

Custom Themes are the design templates that determine visual appeal of your website. This includes the colors, graphics, typography and overall style of your site.

Installation is the process of implementing a theme into a Magento 2 platform. It involves uploading and activating the theme so it becomes the new appearance of your online store.

Unlocking Aesthetics: The Ultimate Guide to Installing Custom Themes in Magento 2

Prerequisites for Installing Custom Themes

Before diving into the installation process, there are some essential prerequisites you need to be aware of. Having a detailed understanding of these will ensure a seamless installation process.

First, make sure that you have the latest version of Magento 2 installed on your system. Check the version by logging into your Magento Admin and navigate to ‘System’ > ‘Web Setup Wizard’ > ‘System Configuration.’ Next, you need to find a custom theme in accordance with your preferences. Many websites, such as ThemeForest and TemplateMonster, offer a wide array of Magento 2 themes. Before purchasing a theme, ensure that it is compatible with your Magento version.

Finally, you should thoroughly understand the FTP & SSH Magento file system. These systems are essential for transferring files between your local system and your Magento server. Tools like FileZilla and Putty will hugely assist in this process.

Step-by-Step Guide to Installing Custom Themes

Once you have met the prerequisites, it’s time to install your custom theme. Here is a systematic guide to installing custom themes in Magento 2.

  • Upload Theme: Use FTP or SSH to upload the theme folder to your Magento root directory. The path should typically be ‘app/design/frontend/’. Follow the directions provided by your theme developer to prevent any upload errors.
  • Connect to your server: Connect to your Magento server via SSH. Most hosting providers offer a ‘SSH access’ feature which can be enabled from the control panel.
  • Upgrade Setup: From your server’s command line, navigate to your Magento root directory and run ‘php bin/magento setup:upgrade’. This command checks the system for module updates and upgrades if any are being installed.
  • Deploy Static Content: Run ‘php bin/magento setup:static-content:deploy’. This command deploys static view files.

Refresh your Magento cache to see your new theme in action. From your Magento backend, go to ‘System’ > ‘Cache Management’, select the checkboxes and click on ‘Flush Magento Cache’. You can also flush the cache from command line by running ‘php bin/magento cache:flush’.

Switching over to your new custom theme is the final step. In the Magento backend, head over to ‘Content’ > ‘Configuration’. Under the ‘Default Theme’ column, click ‘Edit’. From the ‘Applied Theme’ dropdown, select your new custom theme and click ‘Save Configuration’. You’ve successfully installed a custom theme!

This guide provides a straightforward method to install custom themes in Magento 2. Always remember to backup your data and setup before making any changes. With all the necessary steps, you’re well on your way to give your Magento store a fresh, new look. Enjoy your new design!

Upgrading Your Storefront: Top Strategies for Installing Custom Themes in Magento 2

Don’t Underestimate the Power of Visuals, Right?

We often take for granted the impact of visual aesthetics on our shopping experiences. Yet, the truth of the matter is it plays an instrumental role. For e-commerce businesses, this translates to the theme of your online store. When your shop is powered with Magento 2, adding a custom theme can significantly enhance your site’s aesthetics, improve shopping experiences, and encourage conversions. The process isn’t as intimidating as it sounds thanks to Magento 2’s flexibility and impressive customizability options.

Frequently-Encountered Difficulties

But why do users hesitate to venture into the terrain of custom themes? One main roadblock is the perceived technical complexity. Installing a custom theme usually involves manual code changes, which most users shy away from. Another hitch might be the fear of disrupting the existing setup while trying to bring modifications. These are legitimate concerns because, without the right approach, the process may lead to downtime or, worse still, data loss.

Nurturing this fear often leads to many e-commerce businesses missing out on numerous opportunities to stand out from their competitors or connect better with their customers. They stick to the basic theme, which although neat and functional, may not fully capture their brand personality or emphasize their unique selling prepositions.

Adopting the Best Practices

Introductory difficulties should not hinder your progress towards creating a visually appealing e-commerce store. Here’s how to do it right:

1. Always create a backup of your Magento 2 store before commencing the installation process. This safeguards your data and allows you to roll back easily in case of any mishaps.

2. Get a Magento 2 theme from a well-vouched, reliable source. Ensure the theme is responsive and user-friendly, as this influences your audience’s experience and, ultimately, their buying decisions.

3. Once you download the theme, upload it to your Magento 2 directory. Extract the theme package into the app/design/frontend directory.

4. Head to the backend of your Magento site. Navigate to Content > Design > Configuration. Click on Edit, then, select your newly uploaded theme from the dropdown menu and save the changes.

5. Finally, clear the cache to ensure the theme is correctly loaded with no remnants of the old theme left behind.

This way, you can install a custom theme without disrupting your Magento 2 store’s operations, thereby transforming the look of your online storefront, amplifying your brand’s personality, and even boosting your conversion rates. Remember, each step you take toward enhancing your e-commerce store brings you one step closer to success in the highly competitive retail landscape. So don’t shy away from making necessary changes that set you apart.

Smart Branding with Magento 2: Deconstructing the Process of Installing Custom Themes

Is Custom Theme Installation Really That Complex?

When considering the process of incorporating a bespoke theme for Magento 2, one may wonder if its complexity extends beyond the realm of understanding for the average user. In fact, the opposite is true. The actual process of installing a custom theme in Magento 2 not only aids in enhancing your online store’s aesthetics but it also assists in the perfection of user-interface (UI) and user-experience (UX) traits. This process demands keen attention to some specific details. The most critical factor revolves around choosing the right custom theme that aligns perfectly with the brand’s identity, followed by properly installing it onto the Magento 2 platform.

Overcoming the Hurdles in Installation Process

The principal issue while installing a custom theme in Magento 2 predominantly lies in the technical aspect of the process. Navigating through the platform’s complicated structure can prove to be a daunting task for someone with limited technical knowledge. Specifically, problems may arise during the process of ‘Theme Registration,’ which involves writing codes in the ‘registration.php’ file. This file is used to declare the basic information of your theme to the Magento 2 system. Incorrect coding or entry of information can lead to errors, preventing the successful installation of the custom theme.

Another issue is the ‘Activation’ step, which is taken care of in the Admin panel. It involves navigating through ‘Content’, ‘Configuration’, ‘Design’, ‘Edit Store View’, ‘Default Theme’. Any misstep in following these steps can make the custom theme installation unsuccessful. Thus, it is advised to study the whole installation process in-depth before implementing it.

Best Practices: Getting it Right With Custom Themes

Learning from others’ successful practices can surely minimize the risk of failure during the installation process. For instance, VenusTheme’s LoftStyle Magento 2 theme is a great example of how a custom theme has been effectively utilized to enhance an online store’s attractiveness. The theme offers an abundance of custom layouts and designs which are easy to install. Another excellent example is the Priori – Responsive Magento 2 Theme by MeigeeTeam, which offers a plethora of functionalities that are beneficial for e-commerce businesses. The theme is highly customizable, SEO-friendly, and responsive.

Further, to avoid problems while installing a custom theme in Magento 2, one can follow some crucial steps: firstly, conducting a detailed review of the selected theme’s code to ensure it adheres to Magento best practices. Secondly, using Magento’s in-built ‘Set Up’ tool or the ‘bin/magento’ command that houses a list of powerful commands to help users install custom themes more easily. It is also beneficial to break up the process into smaller sections (Theme Registration, Activation, and Configuration) and tackle each one individually to ensure enhanced comprehensibility and application success.

Custom themes, when installed correctly, can provide numerous benefits for an online store, such as enhanced user engagement, improved navigation, and a greater driving force behind conversions. Be it Magento or any other platform, the correct incorporation of custom themes is bound to yield successful results.

Conclusion

Have we ever considered the profound impact a captivating aesthetic can make on customer experience and thereby directly influencing your eCommerce sales? The correct application of aesthetic themes can drastically escalate the perception of your website amongst consumers. The installation of a distinctive custom theme on your Magento 2 is not just an addition of some appealing colours and shapes, but rather embedding your entity’s unique DNA into your website. As a brand owner, it provides you with an opportunity to create remarkable memory hooks for your consumers and enables you to deliver a memorable visual experience.

We invite you to stay tuned to our blog for a constant stream of helpful tips, tricks, and instructions on everything related to Magento 2 and eCommerce at large. With an array of articles covering a diverse set of topics to assist you in optimizing your online entities, our blog seeks to be your go-to resource in navigating your eCommerce journey. You never know, the next compelling advice we offer might be the exact solution you’ve been searching for and might unlock new dimensions to improving your Magento 2 site.

We are consistently working towards equipping you with state-of-the-art knowledge and for this, we encourage you to look forward to our upcoming releases. We are excited about walking you through the captivating journey of maximizing your sales via an appealing presentation of your online store. Being patient in anticipation for our new releases will definitely be worth the wait, as they will be packed with a dazzling array of information and guides that will help you in further enhancing the performance and look of your website. We genuinely appreciate your continued support and understand that your commitment is the biggest compliment to us.

F.A.Q.

Q1: What are the preliminary steps before installing a custom theme in Magento 2?

A: Before you begin, ensure that you have your theme package ready and that you’ve backed up your Magento 2 store. It’s also essential to disable all cache related sections that can hinder the installation process.

Q2: How do I upload a custom theme to Magento 2?

A: You can upload the custom theme to Magento through FTP or cPanel. You need to upload the theme into the Magento 2 root folder under app/design/frontend/.

Q3: What is the procedure to activate the custom theme in Magento 2?

A: You can activate your custom theme through the Magento admin panel. Navigate to Content > Design > Configuration, choose the store view you want to apply the theme to, and select your custom theme from the dropdown.

Q4: How can I solve problems in case the custom theme doesn’t work properly?

A: If the custom theme isn’t working properly, you might need to clear the cache and then check. If the issue persists, contacting the theme provider or seeking assistance through the Magento community can be helpful.

Q5: Can I switch back to the default theme after installing a custom one?

A: Yes, you can revert to the default theme anytime. This is done via the Magento admin panel by following the same steps as activating the custom theme, only this time, you select the default theme instead.